Friday, October 7, 2011

Vintage Memo Boards

Greetings! Fall is here and my craft room is getting cleaned up and ready for use.

My latest project involves a technique I have been waiting to try out for months.

I call it Vintage Memo Board.


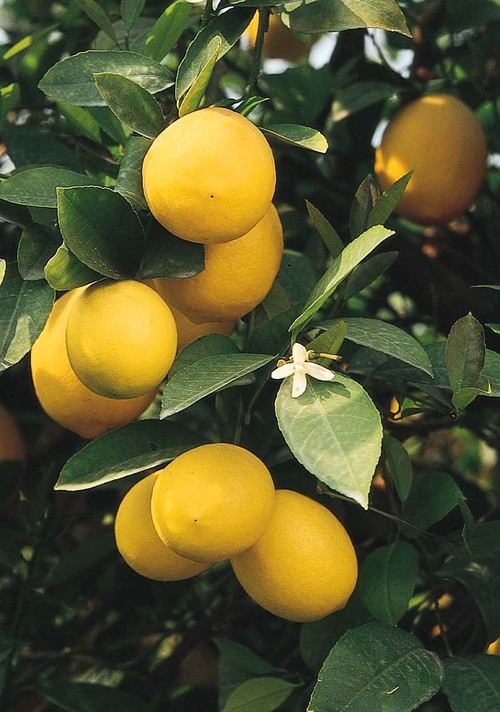
I was inspired by one I saw at Home Goods about a month ago. I knew this was the project for my image transfer technique. I used a solvent called CitraSolv. It's a natural cleanser, made from orange peel and coconut-derived biodegradable surfactant. Yea. That's geek speak for COOLIO!
A few pointers:
Don't use a foam cup. It will melt through it. Paper is a close second.
It smells awesome.
Melted the grease right off of the stove hood. SWEET!
Can be purchased online. I paid about $7 at a Henry's/Sprouts, a produce/health food store.

OK....back to the project.

Step 1: Build a frame.
I used a thin sheet of MDF cut to 22 x 24 inches. Found at Home Depot, about $4.89 a sheet, makes 2 panels.


Cut 2 pieces of 1 x 2 x 8 foot pine to go around the inner edges of the MDF. Home Depot price $2.88 each.


Cut and nail the frame to the back side. I used our handy dandy Porter Cable brad nailer.
Super loud, but OH so efficient!

Step 2: Create the fabric.
Cut a piece of fabric that is larger that your board. I made sure mine was at least 2 inches overhang on each side. I used Osnaberg, an inexpensive, woven fabric. Prewash to shrink and press smooth.

Step 3: Create Images.
I chose 10-12 of my favorite black and white images from the Graphic Fairy. She has some lovely images. Just download and save.

Now...here is the tricky part. The images have to be printed by some ancient copy machine. Your home computer won't do, the one at work didn't work, neither did Staples.
Finally, that junky copy machine at the grocery store, next to the Lotto ticket, was the winner.
So, good luck finding the winning copier. I would also try the unfancy one at the city library.


Place the image on your fabric.
Use a small sponge and rub it over the image, getting it wet.
Then use a spoon to burnish the image onto the fabric.
Badda bing! Image transferred.
The fabric takes about 15 minutes to dry. I popped mine in the dryer, then starched
and pressed it.

Step 4: Attach the fabrics
Cut a layer of batting and place it on top of the board. Trim to meet edges.
Stretch the fabric around the edges and staple on the backside.
Step 5: Create the String Pattern
Mark off increments of 4-6 inches on the sides of the boards. That is where you will attach the jute. Create a diamond pattern with jute. This was tricky. But your eye will tell you if it doesn't look right. Then....there is always a ruler to confirm.
Staple in on the back side of the frame.

Hammer an upholstery nail where the jute crossed. I had to bend the nails over on the back so they didn't pull out.

Step 6: Add a frame hook and hang.

Before: BOOOOO!

After: YAAAAYYYY!
So pretty, I don't even want to hang things on it!

I would not suggest washing the fabric after transferring the image. It fade dramatically.

This technique is would be terrific for pillows too!

Enjoy!

For another tutorial on CitraSolv.


Wednesday, April 27, 2011

Lemon tree

Sweet Pea just got home from college for the summer. I was working on a project when she asked me, "What are you into?"

Good question. My blog is called Currently Crafting because I have DYI ADD. I throw myself into something and become a little obsessed (a craft room full of tools and gadgets as proof), then after a few months I get bored. Actually, I should say my enthusiasm dwindles or I find something else to obsess about.

Sweet Pea's follow up question: "What have you been doing since I have been gone?"

Not much, I thought. What have I been doing. Certainly not cleaning, or working on projects.
I have been searching for the perfect fabric for drapery...in 3 rooms. Do you know how hard it is to find items in the store you create in your head? Fabric...impossible. But that's another story.

What I did come up with was gardening. Yes! I have been gardening. I had forgotten about the backbreaking days I spent hauling out crumby dirt, mixing manure and amendments, planting, replanting, weeding and pruning the front and back yard.

I share one or two of my successes.


This is an Improved Meyer Lemon Tree.
It's delicious, fragrant and beautiful

Improved Meyer Lemon tropical landscape

This is what mine looked like in May. Sad.
I replanted Sad Lemon Tree into a pot...with real soil.
Surprise! It started to grow.
New buds and flowers.
Hooray!

No fruit yet...but I am hopeful.

Next up...roses.
Here are a few beauties from my front yard.

This is our Libby Rose, a.k.a. Queen Elizabeth.
When our daughter Libby passed away, my dad and I each planted one in our yards.
He lives closes to the cemetery and sometimes take some over to the grave.
Love him!
Here is a lovely "Peace"
I think this is a" Double Delight".
Finally, I'm not sure the name of this one, but it's a gorgeous yellow with green edges.

So that, Sweet Pea, is what I am into.

Monday, April 18, 2011

Media Center

I've been searching high and low for an affordable console/media center to fill this whole
Nice, huh?

So, I start at Pottery Barn. HAhahahahah. Affordable? Yeah!
Pottery Barn is where I go to get ideas, not make purchases.
So I see this little beauty.
Price $999....that's dollars, thank you.

Gratefully, I have been successful in the second-hand furniture department. I found this classy piece on Craig's..after just a few days of looking.

However, the big winner was a Thomasville dresser I found at Salvation Army. I saw it, thought about it, measured it twice, thought some more, then sent my daughter to pick it up one day while I was at work. It was half off...$144! Score!
before picture

I spent several hours (read: days) sanding and filling holes.
Then I used several coats of Rust-oleum spray primer in red, then 3-4 coats of
Rust-oleum Colonial Red in satin. As a final touch, I used Minwax walnut stain to distress and add dimension. Finished off with clear coats.
Spray paint is fabulous!

It fits like a glove!

New hardware to finish off the masterpiece.
My neighbor said this looks like a happy face! I agree.Excellent storage for Wii and dvd.
Each drawer holds dvd....perfectly.
Total cost under $200. BAM!
My two helpers. Thanks guys!

Im linking to:


Check them out!

Easter Eggs

Wow! Over 2 months since my last post. Sheesh!

I finally took the time to complete some fun Easter/Spring decor.

Lovely specimens have been gracing blogland in all types and fashions...butterflies,

shoponalark on etsy

spiders, flowers, shells, hearts...you get the pictures.

I unloaded my spring tubs from the garage a couple of weeks ago and found a hideous egg topiary I had tried to put together last year. Simple ugly. So, tore it apart and created a framed egg specimen display.

Each egg is cut in half (tricky when some are plastic) and I needed to hot glue some spanish moss on the edges to hide where the paint had chipped. I actually like that part. Then, I glued each egg to a piece of sheet music that I distressed with a little of Tim Holtz distress ink (THE BOMB!) I use it on everything...paper, fabric, paint. Since this was an old frame I found in the closet and of course, is missing a backing, I used semi-permenant glue dots to attach the sheet music to the frame glass. The 3D effect is nice.

Here is the finished pieced on my buffet, Baxter.
Looks like an Eggapalooza, if you ask me.

So, there is my new addition to the Easter Collection of crap to dust.
What have you added this season?

Enjoy!

I'm linking to the following parties:

Tuesday, February 8, 2011

Chalkboard Love

You know my love for chalkboards. I've linked up to a chalkboard party...Whoo-Hoo! There are a few super cute ideas. Take a look!


Saturday, January 22, 2011

Ruffled Tee

I finally completed this ruffled tee, after falling in love with the "Inception Scarf". The Inception Scarf was actually made with the remnants of this gray heather knit.
Total cost of t-shirt...about $5.00...BAM!
I can't believe I actually model it, or the picture taken by my 10 year old turned out. He accidental had the camera setting to "extra wrinkled face".

I struggled to finish the ruffle, not quite sure how I wanted it to look. I knew that I wanted to wear it specifically with a charcoal cardigan sweater I have. The first ruffle went all around the neckline. Very circus-clowny. So I took off the ruffle, cut it in half, and laid a narrower ruffle on the top. Now the t-shirt is perfect for the sweater.
Here is a close up.

I did make the t-shirt, but you can buy one and add a ruffle of coordinating knit. The t-shirt was actually super simple. I took one of my favorite fitting tees, a Mossimo from Target. Turn the t-shirt inside out, laid the Target shirt flat on the table, then folded in half, straight down the middle. I traced around the neckline, shoulders, armholes, sides and bottom. Then added 3/4". Do the same for the back and sleeve. Three easy pieces. Much easier that it sounds. Now I have a pattern to make a pajillion tshirts. You can alter the length of the sleeves, necklines, etc.
No buttons, zippers or ties. Yippee!
Let me know if you have any questions.
Enjoy!


Monday, January 17, 2011

Welcome Eleanor

I'd like to introduce you to the newest furniture member in my house.....Eleanor.
She was acquired last week in a brilliant Craigslist exchange...money for furniture.
I found her after only a few days of serious search, which completely contradicted my theory of "Nothing good is ever found in my neighborhood". Actually, I had to travel to the tony city of Carlsbad, CA to find her. Well worth the trip.
She is a Bernhardt antique, supposedly purchased from an estate sale in North Carolina about 45 years ago. Whatever, I bought it, story and all.
Now the dilemna. She has a cruddy top and some dings and worn spots. Nothing serious, though. How to refinish her? Lovely, glazey paint finish, refinish as original or something new?
Her new home is across the room from Baxter:
Baxter is a handpainted sideboard. Tobacco, green and a teeny bit of gold finish.
So HELP! What do I do? I am not into matchy-matchy. I love pieces that are collected over time and have character.
Sidenote: Yes, I do name most things. My car is called Butterscotch and my dog Oliver.

Thursday, January 13, 2011

Your help needed!

I am in the middle of a transition. For the first 10 years of my married life, I had pink walls and blue floral sofa. I loved them.

Flash forward 20 years.
Now, I am a little older, no babies to worry about and my style has become a little more refined. I have been stalking, reading and blotting my new style/strategy. My husband, while tolerant of my shenanigans, does not read my blog and has very little idea what happens while he is a work. Poor dear!

Here is my current living room status and some ideas:

Millwork, including crown molding and maybe even wainscotings.
Good-bye to Eleanor's green predecessor, the sofa table.
Window treatments on the horizon. 3 long panels. Fabric-to be determined.
Wingback chair is going to be slipcovered...very soonly, in drop cloth. Imagine this:
Floral and denim wingback...relocated to another room.
End table...refinished...maybe painted?
Window treatment: valances to coordinate with panels.
I'm thinking something like this:
Victorola...loved this piece given to me by my grandmother. Doesn't work, but splendid at holding sheet music and books. Said piece will soon be moving to my sister's home.
Bookcase...BA-BYE! I have great plans for a "booknook" in an underutilized computer nook upstairs. This is the only project husband is aware of, and not to crazy about.
A lot of talk about resale values, blah, blah, blah.

And we are back at the entry way with Eleanor.
Here are a couple of other ideas.
Good bye to yellow #13.
I have loved this yellow in 2 houses for over 9 years. Time to move on.
I'm thinking something more neutral, BM-OC14 Natural Cream.

Hate, Hate, HATE carpet. Tile, not so much love either. Would love to replace with wood all downstairs, but that includes a kitchen island remodel that is a couple of years away.
Who designs kitchens anyways? Men, men who don't cook!

ok. So sorry to drag this on. I have been thinking of this post for a couple of weeks. I am soliciting any and all suggestions. You ladies are so wonderful and generous.
Thanks and see you Lowe's!

The Inception Scarf

Have you seen the movie "Inception"?
Me either....but I live with people (Sweet Pea) who LOVE it.
So, when I made a scarf within a scarf.....it had to be the
"Inception Scarf"

Here is how it goes down:
You'll need 3/4 yard stretch knit. Will also work with fleece.

See Suzanne's version in fleece. Very cute. I am sure I CASE'd this scarf from her.

Cut 2 pieces of stretch knit 8 x 60 inches; sew ends together to make one long 8 x 120 inches.
Cut 3 pieces of stretch knit 6 x 75 inches; sew ends together to make one long 6 x 150 inches.

Gather 8 inch wide piece of fabric by stitching down the middle. Use a long stitch when gathering. I bunched it up and I pushed it through the needle as I go along.
Your finished length should be about 60 inches.

Do the same thing for the same thing for the 6 inch wide piece.
The finished length should also be about 60 inches. I will be a little fuller than the 8 inch wide piece.

Turn under the ends of each layer.....stitch to finish.

Pin the 6 inch piece on top of the 8 inch;
adjust the gathers so that both layers are the same length.
Stitch down the middle of both pieces.

Sew down the middle again using a zigzag stitch to secure the gathers.
Next time I will stitch a piece of ribbon to the backside of the stitching, just to make sure the stitching doesn't pull out.

There you go....Inception Scarf...a scarf within a scarf. Sweet.
My girlfriend ALMOST didn't get this for her birthday. Sweet Pea loved it so much.

I love the way it makes a little collar.

Oliver.....inspector number 16...quality control.