Sunday, December 26, 2010

Christmas Tag

Merry Christmas!
I had such brilliant plans, and as usual, they didn't all come to fruition.
I have a list of holiday craft projects to do.....maybe complete them now and be ready next year?
I wanted to post all of my beautiful Christmas decorations...hasn't happened. Is it too late?
Wanted to make handmade gifts for dear friends....still working on a few. Maybe birthdays?

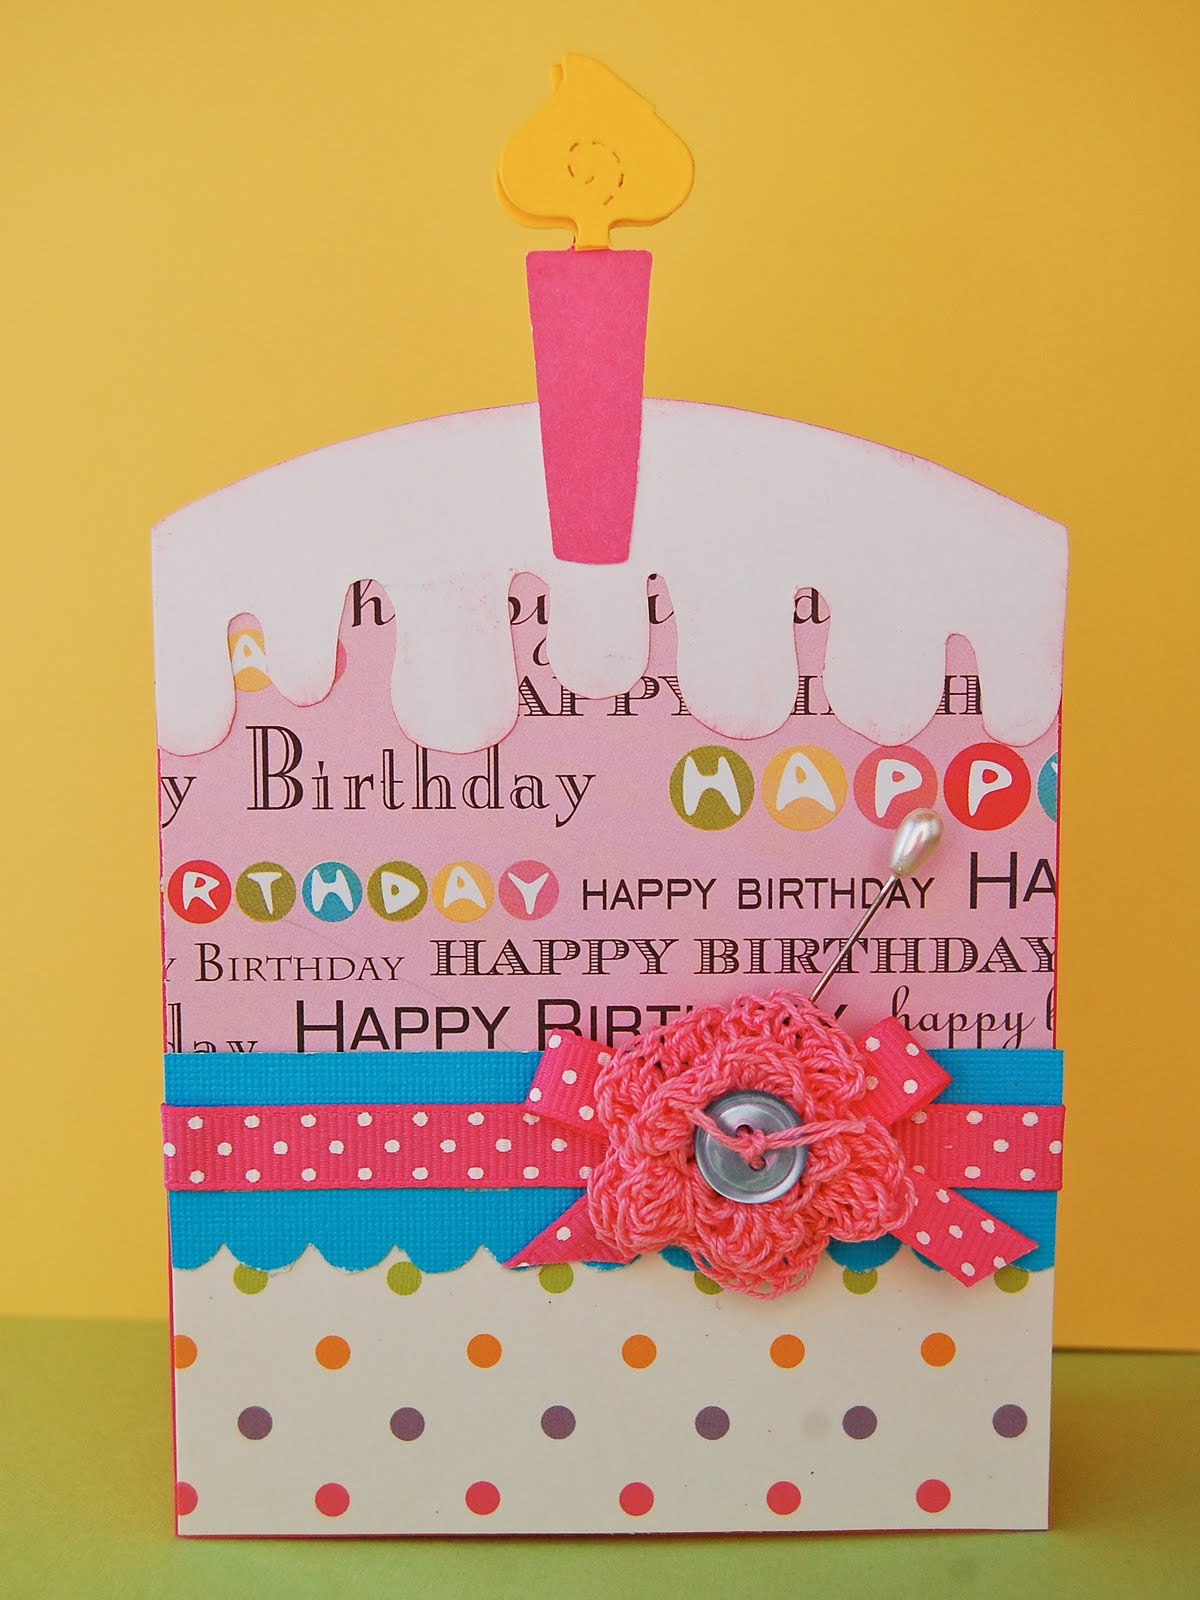
Well, here are a couple of things I did manage to squeek out at the last minute.
I was inspired to use vintage images after seeing a lovely gift wrapped at French Garden House.
Special thanks to the Graphic Fairy for sharing so many sweet images. I had a hard time decide which ones to use.


I used dotted swiss embossing folder, dictionary flower and a gold embossing sentiment


Simple text and reindeer graphic.
Did you know caribou, or reindeer are good swimmers?


Another Graphic Fairy image with some berry and leaves from my stash.


Graphic Fairy image and a little gold glitter on the candle flames.

GF image and scraps do the trick. I loved that little scarlet birdie.


Finally, a graphic from the interwebz....I can't remember where...and I will check because I want to give credit. Nothing original here!

A few sweet images, scraps and my news Sizzix tag die, I cranked these out at 1 am the other night. Still haven't been to bed before 1 am in the last 4 nights. Perimenopause sucks! Thank heavens for Ambient!

Enjoy!


Thursday, November 18, 2010

Pottery Barn Pillows

Happy Thursday!
A week before Thanksgiving and things are moving right along. We are going to be visiting family, so no dinner at my house this year. Shoosh!

However, we will be visiting some dear friends who will be hosting my brood for the turkey/Harry Potter/shopping/football fest.

It's only polite to bring something to the hostess, don't you think?

This year my husband will be bringing a 24 pack of Diet Coke (how very thoughtful!) and some summer sausage. I don't think our hostess will care much, but the hubby's will enjoy the snacks while watching football.

My hubby thinks with his tummy, I think with my eyes. When I saw these pillows at Pottery Barn Teens, I think I screamed a little.


Cute, bright and embroidered.

Then I inspiration on how to make them at Naptime Crafters and it was all over and done.

Here are mine:


I call this one: Owlie Babba and the 40 Leaves
Falling Leaves

They turned out sooo nice, that my sister is getting the same set for her birthday. The
floral pattern is perfect for her living room (cross fingers).
I even, quite by coincidence, came home for the store with the same fabric as Naptime Crafters.
Hum. Must be cuz it's so cute.


Enjoy!

Saturday, November 13, 2010

Future Star Stencil

Happy Saturday!
Thanksgiving is coming up and I am getting stressed. But, that doesn't stop me from working on projects on the BOTTOM of my To-Do List. Ha!

Today's project is a "BING" light bulb idea I had last week. I have seen lots of fun projects out in blogland using freezer paper stencils.
Heeeellllllooooo! Where have I been?

Lacrosse season is coming up and I wanted to make to cool shirts for my boys, Lazy Boy and Drama. Here is Drama modeling my SECOND attempt. I'm not even going to post the first shirt. Yuck!


beautiful fall day


I am so happy the way this turned out. Now, I have got a bunch of LAX ideas on my scribble pad ready to go.

Want to know how?
There are a ton of tutorials on the interwebz, so I'll hook you up with a couple of good ones:
Dana at Made
Cheri at I am Momma

Here is a couple of tips.

I design my graphic in Pages, cuz I'm a Mac girl and Photoshop stupid. It's easy to manipulate images and resize.

When cutting your stencil, put a fresh blade into your Exacto knife. Totally makes a difference.

Use a piece of freezer paper behind the fabric so that the paint doesn't soak through. DO NOT use cardboard.

Use the paint designed especially for fabric. I like Tulip Soft Fabric Paint, in Matte. It's cheap ($1.69 a bottle) and comes in many color. It's the perfect consistency to paint, leave a good coat of color and not bleed through.

DO NOT use watery, acrylic paint.

Use a specialty brush. Also inexpensive, and sold right next to the fabric paint.
DO NOT use a big, foam brush, unless you have a large area to cover.

Hope to make a lot more stencils and finish, FINISH a few projects this weekend.

Cheers!


Thursday, November 11, 2010

Sweet Pea Banner

Sweet Pea's birthday was last week and since she is attending college 1200 miles away, I wanted to send something to make her day special.
I put together a banner for her party at Grandma and Grandpa's house.
(Of course, it arrived 2 days later. Urgh!)

I used the Girl's Paperie line "Paper Girl" that I won at April's charity auction.
I can't get enough of this goodness.

I also stole....blatantly stole the ideas and the circles from
then added some sweet butterflies so that I could use the paper cuts.

I had to print out the letters, mirror image, with the compy.
Man, a Cricut would have saved me a boatload of trouble.


Forgive the lighting. I finished the project at 9:30 pm and immediately
packed it up for shipping the next day.


Sweet Pea called yesterday and G & G brought over her banner and presents.
What other 19 year old would love this


AND this?

Happy Bday Sweet Pea!

Monday, November 1, 2010

Halloween Wrap up-Craft Style

Now that Halloween is over, it's time to take down the pumpkins and whatnot. Here is a quick shot of my mantle before it goes into a box 'til next year.

First up, Halloween banner. Sweet Pea has a completely blank, white dorm. Made this to add a little color.
She liked it. I should have made like 15 of them to fill up that wall.

There is my lovely owlie plate.

The vinyl was $5 from Wonderfully Wordy
and the plate was $1 buck from Home Goods
SCORE!!!

Here was a fun project. I made this fun candle wrap with the paper I won from Margie Romney-Aslett. You can see all the goodies I won at my other blog.
Thanks Margie and April!
A friend and I went to Tai Pan yesterday and got some goodies....OOOOHHHH!
Looking forward to finding new homes for those new pieces.

Monday, October 18, 2010

Vinyl Giveaway

Today I am sharing a give-away with Wonderfully Wordy. I just ordered the vinyl owl

for my Halloween mantel (coming soon!) and would love some more vinyl. Who doesn't love vinyl? I have several around my home, but my favorite is the front door. It says "No solicitors or flyers". I might as well said, "LET LOST!" But it totally works. I don't get junk or salesman at my door.

So if you would like some vinyl, go to Sweet November and join the giveaway.
I totally need/love the pantry canisters. Don't you think I need those?

Enjoy!

Thursday, October 14, 2010

Halloween Banner

Sweet Pea lives in the college dorms, complete with white cinder blocks. I made a Halloween banner to add a little color to that sparce, blank space. I did a lot of cutting and folding during a recent Sunday while watching church on t.v.
(BEST ever!).
I printed out each letter onto bright green cardstock using a "Lord of the Rings" font. Who knew...never mind. Geeks and nerds know that stuff.
(It doesn't look like green in the above photo, see below)

Next up, punched out 3" scallops out of eggplant and glue letters on top.

Then, I used 2 different designer papers, a black stripe and orange polka dot. Cut each into 2" x 12" in strips. Glued 2 strips together (2" x 24"), folded every 1/2 inch to form the medallions.

Finally, I sent all of the pieces to Sweet Pea and she glued them together on a 3/4" ribbon. I wasn't sure about the length of the room, so she did it herself.
Here is it....Tah-dah!
Needless to say, this wall needs a lot, LOT more color.


I am looking forward to making another one for myself....this time with yellow or cream centers (oohhh...That sounds like a cookie!)

I've got a ton of other Halloween/Fall projects that are midway to completion.
Working a lot has put some money in my pocket, but a cramp in my crafting time. Can't win!

What is your newest decor addition this fall?


Enjoy!

Saturday, October 2, 2010

Autumn, wishful thinking

Today's post is a wish for fall to come. Summer decided to extend it's stay like an old, stinky ...I don't know, but you get the picture.

I have been decorating my front door in the hopes of some kind of cooler weather arriving.
That didn't work. What did happen was crazy lightening and thunder storms and big fluffy clouds and humidity. Huh. Well, at least it isn't 110 degrees.


Oh yeah....these were live flowers... almost dead now. What the heck, Summer. Go away!

Next week, pumpkins make their appearance. Maybe that will invite cooler weather.

Ciao!

Wednesday, September 29, 2010

Banana Bread

Check out my post for banana bread.
You'll wish there was smell-o-vision here.

Sunday, September 26, 2010

Chalkboard Paint....some more

Hi ya!
So with school starting, crafting has been on hold.
With my new love of chalkboard paint, I have moved on to pottery.


The first pot is painted with red trim on the top and chalkboard paint on the pot. This is a perfect year-round pot....Back-to-School, Fall, Christmas, Valentine's, etc. Write in your favorite phrase and switch out the flowers. This season....mums.
Also, a great idea for treats. This pot is fill with my favs, tootsie rolls.
It says "Here's to you, Toots!"

What else can I do with chalkboard paint? Stay tuned!


Tuesday, August 31, 2010

School Girl Birthday


Happy Back to School!

Today's card is a birthday card for a teacher buddy. Actually, I have a lot of teacher buddies, so I may put this card into assembly line mode to crank a bunch out.

I used one of my favorite stamps by Pure Innocence, along with my favorite Cosmo Cricket paper, "Early Bird".
As you can see, I added an old school black board. I love, LOVE chalkboards. See previous post for my blackboard message center in my kitchen.

I have gotten a little chalkboard crazy. Stay tuned for some projects with that nifty paint.


Tuesday, August 3, 2010

Hey!
How's it going? Enjoying your summer?
Today's card is a simple one I created after I saw something like it at Target.
Super easy get well card.
I punched a square for the tissue box, cut a little corner of tissue and glued it on.
Then, I cut out some little slipper.
The sentiment is from a Pure Innocence set...Umbrella.


Stay Fabulous!

Monday, August 2, 2010

Hola!
Today's card is a simple birthday card. I was trying to use up the last of my sticky ribbon. It didn't fold into a bow nicely, but with a couple of sticky dots, I got it done.


Summer is coming to a close. It went too fast this year. The kids start school on the 11th. Unbelievable!
I saw Thanksgiving items for sale at Joann's the other day.
I'm so not ready for fall. Not yet. Still enjoying the great weather.
Stay Fabulous!

Sunday, August 1, 2010

Sweet Fruit

Hello!
Today's card is a quick card for a friend I never get to see.

Used some $1 g studio stamps from Joann's and a layout borrowed by Mary Fish.

Stay Fabulous!

Saturday, July 31, 2010

Birthday cake

Hello!
Today's card is a sweet birthday card.


This is the first card with a crotchet flower on it. Whatcha think? It took me a couple of days of You Tube to figure out how to make that little sucker. I hope to pop out a couple of more soon.

The inspiration from this card is from a site called Paisley and Polka Dots.
Last spring they had a min album kit that had a cake page that inspired this card. So props to them!

Friday, July 30, 2010

Card Style Fun and Cute Challenge in the Moxie Fab World

Howdy! Took a few days off to work on some more projects at home and take the kids on a field trip to San Diego. But here I am back with a fun, summer card.

Today's card is a card I would call Fun and Cute.
It's for the Moxie Fab World Card Style Challenge.

It's a waterfall card.
Pull the bottom tab of the card, and the lemon squares (yummm) fold up.


The sentiment is above the pull tab.


Here is a look inside. I made a little pocket to hold a packet of Crystal Light lemonade.

Hope you enjoy!
Stay Fabulous!

Wednesday, July 21, 2010

Magnetic Chalkboard

Hello!
Today's project has been in the works for a few months. Finally had the time to put it together. I love chalk and chalkboards. Just wonderful. As a teacher, I think it is literally in my blood. So, I needed a large "message center" in my kitchen. Had a nice magnetic chalkboard from IKEA and a wired photo display, but I wanted to supersize them.

I started with a piece of 24" x 36" aluminum sheeting. Can be found at hardware stores, my from Lowe' . I also purchased a can of chalkboard spray. Pure genius. After wiping the sheet metal down of dust, I sprayed 3 coats of chalkboard paint and let it dry overnight.

Here is where H.H. (Helpful Husband) comes in. He made 2 pilot holes at the top and bottom, then drill the chalkboard into the wall.

Next we trim some MDF board to make a frame. HH nailed it into the wall using his
pneumatic gun. A
great excuse to get out power tools.
Next up, fill in the nail holes and sand smooth.
Tape off the frame for painting.

I used glossy spray paint to complete the frame.
3 coats and 24 hours later...
Tah-Da!
Supersized Message Center.
The beauty is that the chalkboard is magnetized and I can put all kinds of cutie magnets up.
Now this little beauty gets moved to my craft room to display new cards and such.

What kind of projects are you doing this summer?
Hope you enjoy!
Stay Fabulous!